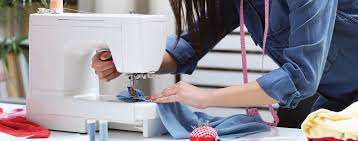
3D puff embroidery is a striking technique that adds depth and dimension to your designs, making them stand out on clothing and accessories. This method involves using foam to create a raised effect, giving your embroidery a unique and eye-catching appearance. If you want to learn how to create 3D puff embroidery with your embroidery machine, follow these steps.
Materials Needed
- Embroidery Machine: A machine with a large enough hoop for your design.
- Embroidery Thread: Use high-quality threads that will hold their color and texture.
- Puff Foam: Choose the right thickness for the effect you want to achieve.
- Stabilizer: A medium-weight tear-away or cut-away stabilizer is recommended.
- Design Software: Software that supports embroidery file formats and allows editing.
- Scissors: For trimming excess foam after embroidery.
Step-by-Step Guide
Step 1: Prepare Your Design
- Choose a Design: Select a design that works well with the 3D puff technique. Fonts and logos with bold outlines are ideal.
- Edit the Design: Use your design software to modify the file. You’ll want to add a layer where the foam will be placed. This usually involves creating a satin stitch outline for the puff foam.
Step 2: Set Up Your Machine
- Hoop the Stabilizer: Place your stabilizer in the embroidery hoop, ensuring it is taut.
- Load the Design: Upload your edited design to the embroidery machine and adjust the settings for the fabric you are using.
Step 3: Embroider the Base Layer
- Stitch the Outline: Begin by stitching the first layer of the design, which will serve as a guide for placing the foam. This should be a satin stitch that outlines the area where the foam will go.
- Stop the Machine: Once the outline is complete, stop the machine to add the foam.
Step 4: Apply the Puff Foam
- Cut the Foam: Cut a piece of puff foam slightly larger than the outlined area.
- Place the Foam: Lay the foam directly over the stitched outline. Ensure it is centered and covers the entire area.
- Resume Stitching: Continue with the embroidery machine to stitch over the foam. The machine will create another satin stitch that will secure the foam in place and give it the raised effect.
Step 5: Finishing Touches
- Trim Excess Foam: After the embroidery is complete, carefully trim away any excess foam around the edges of the design. Be careful not to cut into the stitches.
- Remove Stabilizer: Tear away or cut the stabilizer from the back of the fabric as needed.
Tips for Success
- Choose the Right Foam: Experiment with different thicknesses of puff foam to find what works best for your design.
- Stabilization is Key: Ensure you use adequate stabilizer to prevent distortion during stitching.
- Test Your Settings: Before starting on your final project, test your settings on a scrap piece of fabric to ensure you achieve the desired look.
Conclusion
Creating 3D puff embroidery can elevate your projects and provide a professional finish. By following these steps and practicing with your embroidery machine, you’ll be able to create stunning designs that are sure to impress. For high-quality machines and materials, explore options from a trusted embroidery machine manufacturer. Happy embroidering!

